Response를 내리는 다양한 방법.
import org.springframework.web.bind.annotation.GetMapping;
import org.springframework.web.bind.annotation.RequestMapping;
import org.springframework.web.bind.annotation.RequestParam;
import org.springframework.web.bind.annotation.RestController;

@RestController
@RequestMapping("/api")
public class ApiController {

    @GetMapping("/text")
    public String text(@RequestParam String account){
        return account;
    }
}

문자를 리턴하여 Response를 받는 방식.
적상 작동은 한다.
2. 객체를 만들어 Response를 받는 방식.
    //Json
    @PostMapping("/Json")
    public User json(@RequestBody User user){
        return user;
    }
}
package com.example.project.dto;

public class User {
    private String name;
    private int age;
    private String phoneNumber;
    private String address;

    public String getName() {
        return name;
    }

    public void setName(String name) {
        this.name = name;
    }

    public int getAge() {
        return age;
    }

    public void setAge(int age) {
        this.age = age;
    }

    public String getPhoneNumber() {
        return phoneNumber;
    }

    public void setPhoneNumber(String phoneNumber) {
        this.phoneNumber = phoneNumber;
    }

    public String getAddress() {
        return address;
    }

    public void setAddress(String address) {
        this.address = address;
    }

    @Override
    public String toString() {
        return "User{" +
                "name='" + name + '\'' +
                ", age=" + age +
                ", phoneNumber='" + phoneNumber + '\'' +
                ", address='" + address + '\'' +
                '}';
    }
}

현재는 카멜케이스로 동작하는 것으로 돌아가고 있다. 스네이크 케이스로 변환해보았다.
2가지 방법이 있다.
@JsonNaming(value = PropertyNamingStrategy.SnakeCaseStrategy.class)
public class User {
    private String name;
    private int age;

    @JsonProperty("phone_number")
    private String phoneNumber;
    private String address;
@JsonNaming, @JsonProperty
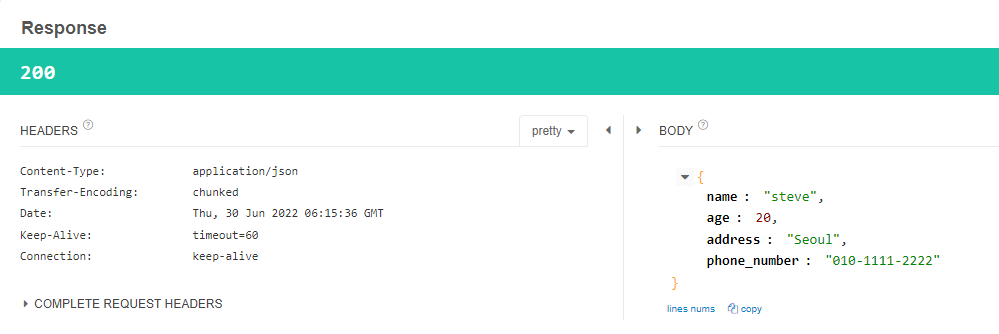
3. Json object를 내려주는 방법.
명확하게 응답을 내려주는 방법.
User로 응답이 내려 갈 때는 항상 200ok가 응답이 내려온다.
잘못된 응답은 물론 400대 응답
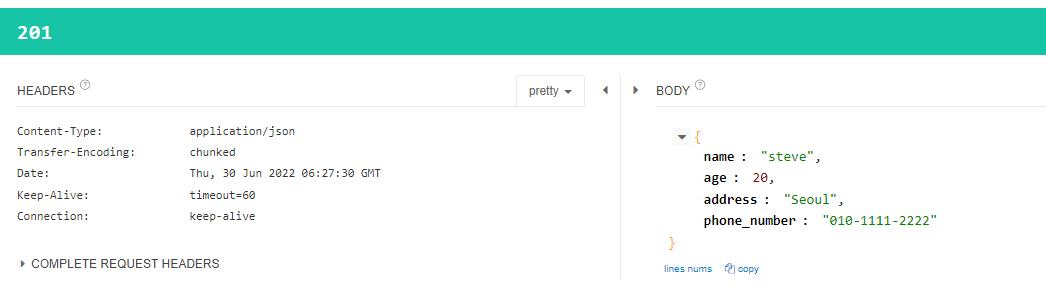
put으로 객체 응답이 내려갈 때에는 201로 내려간다.
Response를 내려줄 때 http 스테이터스를 정해주기 위해 ResponseEntitiy<>를 이용하여 내려주어야 한다.
@PutMapping("/put")
public ResponseEntity<User> put(@RequestBody User user){
    return ResponseEntity.status(HttpStatus.CREATED).body(user);
}
이렇게 하면 ResponseEntity에 명확하게 httpStatus 코드도 지정할 수 있고 body에 데이터도 입력 가능. objectMapper를 통해 user data도 Json으로 변환되어 내려간다.
정리: 응답에 대해 커스텀이 필요하다면 ResponseEntity 사용.
/**
 * {@code 200 OK}.
 * @see HTTP/1.1: Semantics and Content, section 6.3.1</a>
 */
OK(200, Series.SUCCESSFUL, "OK"),
/**
 * {@code 201 Created}.
 * @see HTTP/1.1: Semantics and Content, section 6.3.2</a>
 */
CREATED(201, Series.SUCCESSFUL, "Created"),
/**
 * {@code 202 Accepted}.
 * @see HTTP/1.1: Semantics and Content, section 6.3.3</a>
 */
ACCEPTED(202, Series.SUCCESSFUL, "Accepted"),
/**
 * {@code 203 Non-Authoritative Information}.
 * @see HTTP/1.1: Semantics and Content, section 6.3.4</a>
 */
NON_AUTHORITATIVE_INFORMATION(203, Series.SUCCESSFUL, "Non-Authoritative Information"),
/**
 * {@code 204 No Content}.
 * @see HTTP/1.1: Semantics and Content, section 6.3.5</a>
 */
NO_CONTENT(204, Series.SUCCESSFUL, "No Content"),
/**
 * {@code 205 Reset Content}.
 * @see HTTP/1.1: Semantics and Content, section 6.3.6</a>
 */
RESET_CONTENT(205, Series.SUCCESSFUL, "Reset Content"),
/**
 * {@code 206 Partial Content}.
 * @see HTTP/1.1: Range Requests, section 4.1</a>
 */
PARTIAL_CONTENT(206, Series.SUCCESSFUL, "Partial Content"),
/**
 * {@code 207 Multi-Status}.
 * @see WebDAV</a>
 */
MULTI_STATUS(207, Series.SUCCESSFUL, "Multi-Status"),
/**
 * {@code 208 Already Reported}.
 * @see WebDAV Binding Extensions</a>
 */
ALREADY_REPORTED(208, Series.SUCCESSFUL, "Already Reported"),
/**
 * {@code 226 IM Used}.
 * @see Delta encoding in HTTP</a>
 */
IM_USED(226, Series.SUCCESSFUL, "IM Used"),
//200대 응답 종류
page를 리턴해주는 방법도 있다.
html파일 자체를 리턴시켜주는 방법도 있다.
import org.springframework.stereotype.Controller;
import org.springframework.web.bind.annotation.RequestMapping;

@Controller
public class PageController {

    @RequestMapping("/main")
    public  String main(){
        return "main.html";
    }
}
<!DOCTYPE html>
<html lang="en">
<head>
    <meta charset="UTF-8">
    <title>Title</title>
</head>
<body>
Main Html Spring boot
</body>
</html>
html 파일을 리소스 폴더 하위 static에 생성하여 응답 요청을 보냈다.
보다 싶이 html파일이 리턴 되었다.
4.
이 부분에서 Json을 어떻게 내려야 하나.
ResponseEntity, @ResponseBody를 사용.
@ResponseBody
@GetMapping("/user")
public User user(){
    var user = new User();
    user.setName("steve");
    user.setAddress("Seoul");
    return user;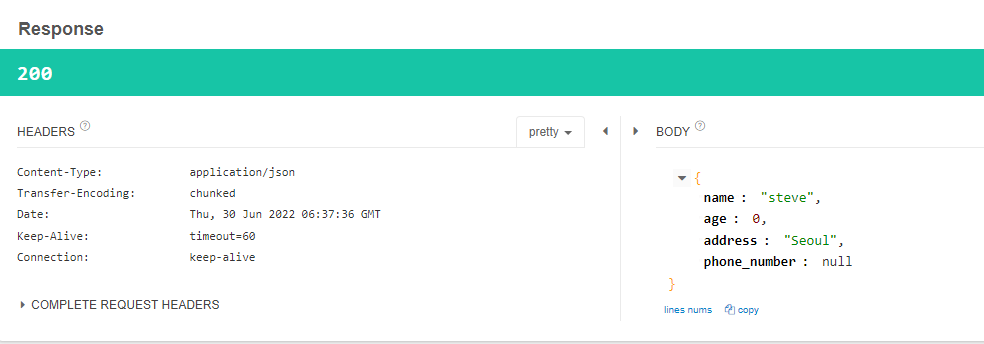
age도 null값을 리턴 받으려면 int를 Integer로 변경해주면 된다.
null 값을 포함하지 않는 Annotation도 있다
@JsonNaming(value = PropertyNamingStrategy.SnakeCaseStrategy.class)
@JsonInclude(JsonInclude.Include.NON_NULL)
public class User {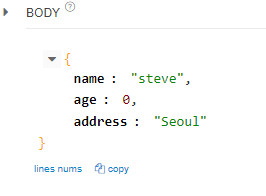
null값이 사라졌다.
정리 : 페이지 컨트롤러에서 @ResponseBody로 내려주게 된다면 html 리소스를 찾지 않고 어노테이션을 통해서 객체를 내려주고 보통 REST API를 많이 개발하기 떄문에 따로 페이지 컨트롤러를 사용하기 보다는 REST API 컨트롤러를 따로 만들어서 REST Controller에 붙이면 ResponseBody 어노테이션을 사용하지 않아도 Return하는 객체나 엔티티를 통해서 Json을 만들어서 내려줄 수 있다.
보통은 PageController는 ResponseBody를 내려주지 않고 page외에 Api컨트롤러를 만들어서 @RestController를 붙여서 서비스를 하는게 비교적 정확하다.
'Spring > Spring 입문' 카테고리의 다른 글
| 7. Validation (0) | 2022.08.23 |
|---|---|
| 8. Object Mapper (1) | 2022.06.30 |
| 6. 리소스 삭제 DELETE (0) | 2022.06.30 |
| 5. PUT API (0) | 2022.06.30 |
| 4. POST API (2) | 2022.06.29 |


